Need Help?
How do I create an alert?
How to Create an Alert
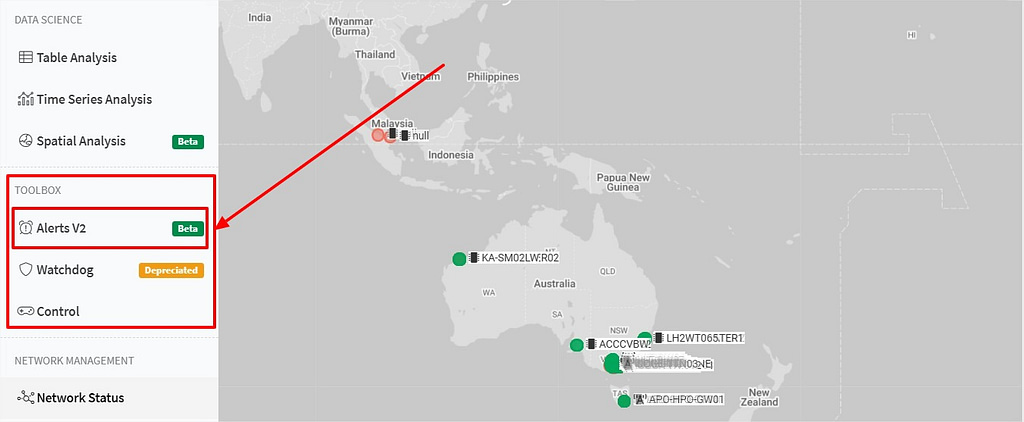
1. Click on the “Alerts V2” tab on the left menu bar under “Toolbox”.
2. Click “Create Alert” button which is in top right corner of the listed alert table.

3. A pop-up window will open to create a new alert. (NOTE: * Fill in all the required fields to proceed to next stages)
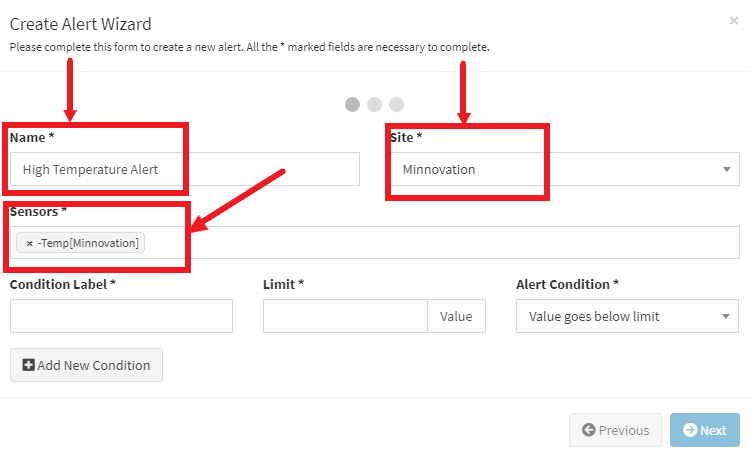
4. Enter a meaningful name for the alert and then select the site from the drop-down menu to locate the sensor’s reading.
5. Then select sensor/s to assign to an alert.
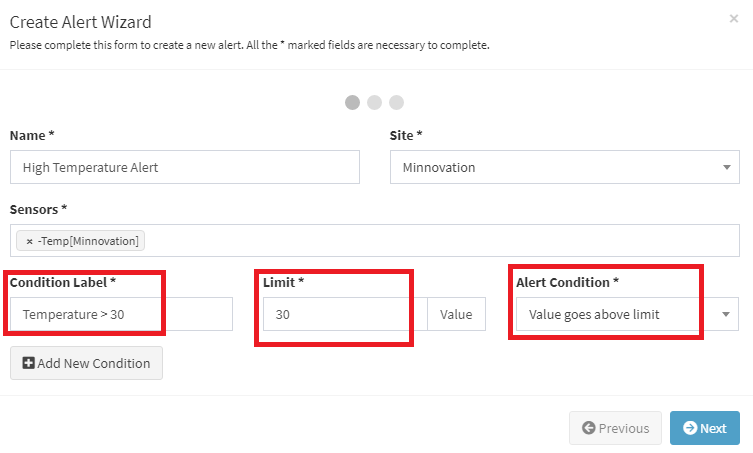
6. Then, enter an appropriate label for the condition, the limit and then select an alert condition.
- For example, if the user enters “Limit” as 13 and “Alert Condition” as the “value goes below limit” then, if the sensor’s reading goes below 13, the user will get an alert.
- For “value is equal to limit“, the user will get an alert when the sensor’s reading is equal to 13.
- For “value goes above limit“, the user will get an alert when the sensor’s reading goes above 13.
- For “Sensor Offline“, the user will get an alert when the sensor stops transmitting the data.
- For “Payload Received“, the user will get an alert when the data is transmitted from the sensor to AlphaX.
- For “Error Code“, the user will get an alert when the sensor is sending an error code due to some issue while transmitting the data.
7. To add another condition, click on “Add New Condition” button, and then enter the condition label, limit and the alert condition for each new condition added as shown below.


8. Click “Next“.
9. In “Notify List”, select the e-mail id to receive an e-mail when an alert is triggered.

10. In the “Notification Subject”, enter the text, which will be displayed as the subject for the alert.

11. In the “Notification Body”, enter a message that you want to receive along with the alert.

12. Under “Notification Channels” the user can select what kind of notification they want to receive from the following options:
- Email Notification: The user will receive an email to the email address provided when an alert is triggered.
- SMS Notification: The user will receive an SMS to the provided phone number.
- Webhook: The user need to provide their webhook URL on which the user want to receive the alerted data.
Click on this link to learn more about “Notification Channels“: http://52.147.34.237/knowledge-base/how-to-setup-different-notification-channels-for-your-alert/

13. Click “Next“.
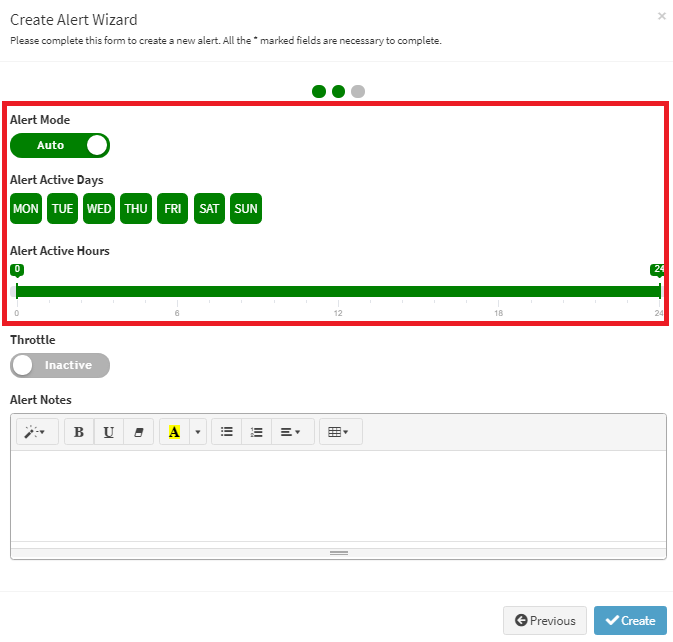
14. The “Alert Auto Mode” allows a user to select the days of a week on which an alert should be active, and can also select the “Alert Active Hours” to specify the times at which an alert will be received.
Click on this link to learn more about “Alert Modes“:
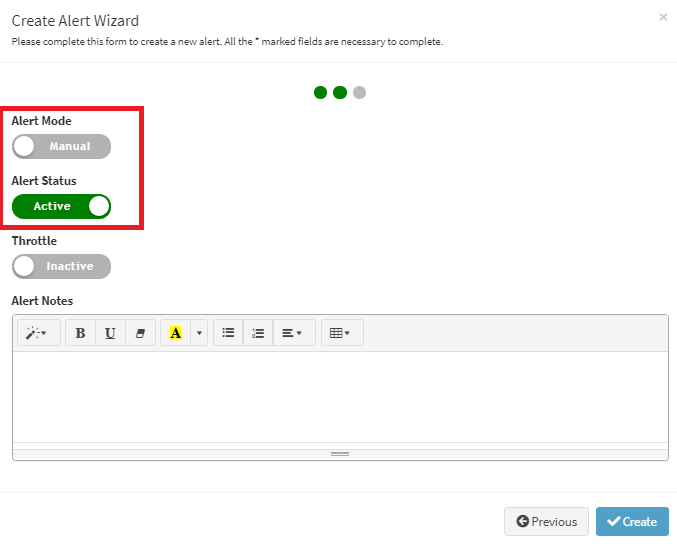
15. When the “Alert Mode” is set to Manual, a user can set the “Alert status” to either Active or Inactive.
16. The “Throttle” is an option, to limit the notification for an hour. By default this is inactive and the user needs to click on it to make it active. Once the throttle is active, the user needs to put a number of hours, that the user wants to receive notifications. Suppose the “Limit 1 notification per” is set as 3, then the user will get only one notification for that alerted sensor for every 3 hours. Otherwise it will be alerted every time the condition is satisfied.

17. User can enter some notes for a specific alert in the “Alert Notes” text box.

18. Finally, Click on “Create” button to complete the process.

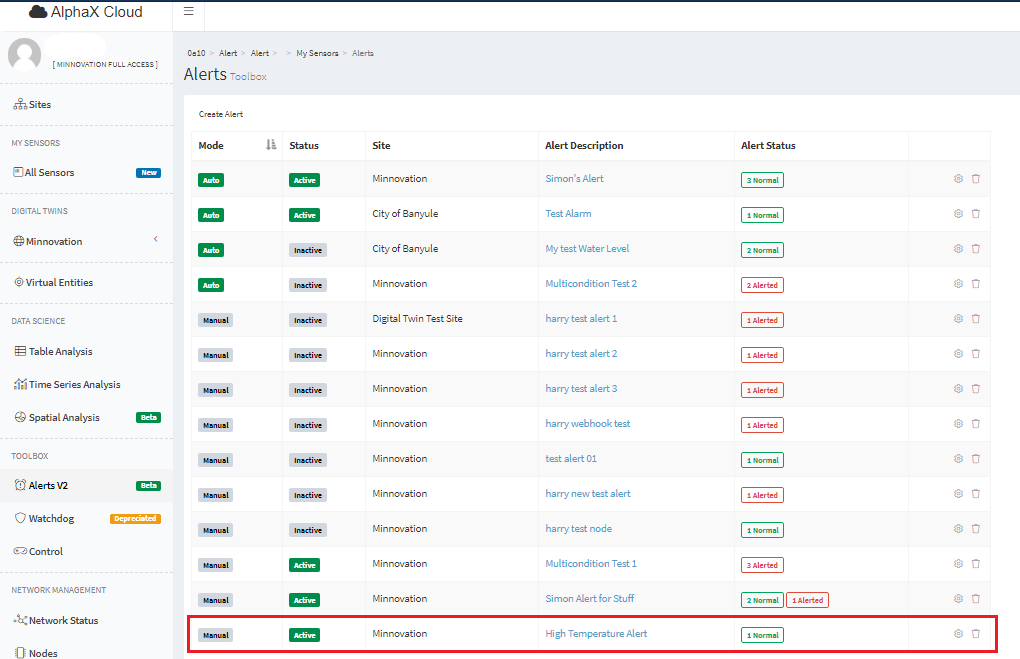
19. Then the newly created alert will appear on the list of alerts, and the alert is in manual mode, active and alert has one sensor, which is not alerted and it is normal.
